
Accidently-on-purpose flower ring tutorial.
This is the tutorial for this flower ring, designed accidentally about a year ago.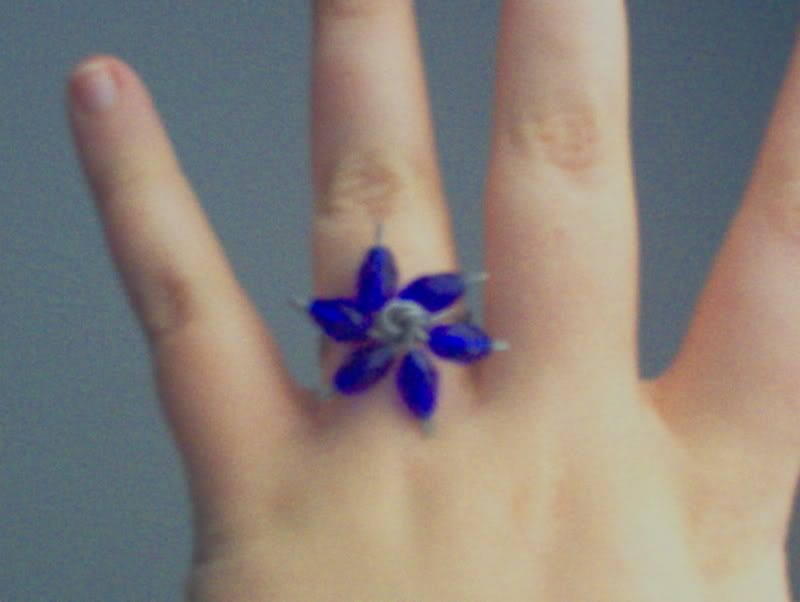
Materials
-about 20 in. 20 gauge tarnish-proof wire, any color
-Jewelry-making pliers
-Wire cutter
-Six beads, oval in shape
-Scotch or masking tape
Instructions1. Cut three 6-inch segments of wire. Straighten these segments with your hands. Line these segments up, so they are "bundled together." Measure about 1.5-2 inches down the wire bundle, and wrap tape around wire bundle. Fan-out the wires, such as in the illustration below: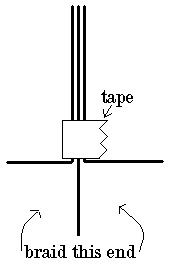 2. Now, braid the wires below your tape, as described in the illustration above. Periodically, bend your braided wire in the shape of a ring, and try the "ring on." Once the ring fits, stop braiding.
3. Press the unbraided ends of your wire together, to create a bundle, and carefully remove tape from the wires. Your braid should still be in the shape of a ring, such as in the illustration below:
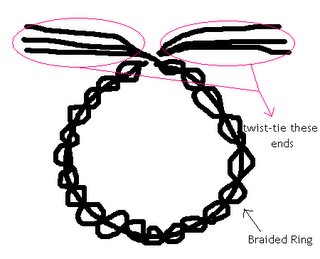 4. Now, while ring is still on finger, twist the unbraided ends around each other, like you would a "twist tie" on a bag of bread. Twist the wires about three times around. You should have approximately 1-1.5 in. unbraided, untwisted wire remaining. Now, spread out this remaining wire to make a "pinwheel shape," such as in the illustration below:
  5. Now, on each fanned wire, you will place one of your beads. Then, use your pliers to create a small eyelet to secure each bead onto your ring. When all six beads are secured, your ring is done! Here's a birds-eye view of one such ring!
Enjoy!

